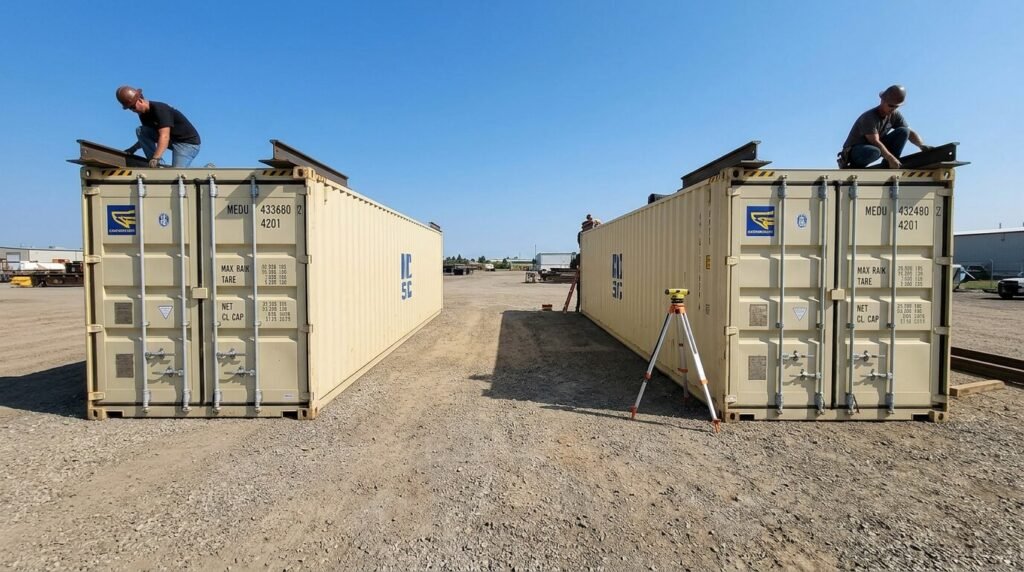

You’ve got two containers, an open yard, and a forecast that’s about to turn on you. That’s usually the moment someone calls asking about a shipping container dome roof – and for good reason. When you need covered space fast, without pouring a foundation or committing to a permanent building, a dome cover bridging your containers is one of the few setups that actually delivers on the “rugged and quick” promise.
I’ve spent two decades on industrial sites watching crews try to rig temporary covers with whatever they had on hand – tarps, scaffolding, borrowed warehouse frames. Half of it blew apart in the first real windstorm. A properly engineered container dome doesn’t have that problem, but only if it goes up right. This guide walks through exactly how that happens, step by step, the way I’d walk a new site supervisor through it.
Pre-Installation: Tools and Site Prep
Before any fabric touches the frame, the ground work decides whether this installation holds up or falls apart in six months.
Start with the containers themselves. They need to sit level, with no twist in the chassis. A container that’s racked even slightly will throw off your rail alignment before you’ve placed a single bolt. Walk the perimeter and check:
- Twist locks or weldments are intact and rated for the load
- Ground beneath each container is compacted, not soft fill that’ll settle
- Drainage runs away from the structure, not toward it
- The site’s prevailing wind direction, so you can orient the dome’s long axis to reduce broadside load
Tool checklist for the crew:
- Impact wrenches (corded and battery backup – you don’t want to lose power mid-bolt)
- Crane or forklift rated for the arch weight
- Pull ropes or tag lines for guiding arches into place
- Torque wrench for final fastening
- Full PPE – hard hats, gloves, fall protection if working above container height
Skipping this stage is the single biggest reason installs go sideways later. Site prep takes an afternoon. Fixing a crooked frame takes a week.
Step-by-Step Installation Guide
Step 1: Securing the Base Rails
This is where the whole structure either starts square or starts crooked – there’s no fixing it later. The base rails mount directly to the container’s top rail, using bolt patterns matched to the container’s structural ribs, not just wherever a hole happens to line up.
Run a string line down both sides before you tighten anything. It sounds excessive until you’ve installed one dome that’s a half-inch out at one end and three inches out at the other. Tack the rails in loosely first, check square, then torque to spec.
This is also where engineering quality separates a structure that lasts from one that doesn’t. Outfits like Sheltirx build their rail systems around tested load tolerances rather than generic stock channel, and that distinction matters most right here – at the base, where every load above eventually transfers down.
Step 2: Assembling the Arches
Arches get built on the ground, never in the air. Lay out each arch section on a flat, debris-free area next to the containers, and assemble hub-to-hub before anything gets lifted.
A few things that matter more than people expect:
- Match arch sections by their factory numbering – they’re not always interchangeable
- Check every gusset plate connection by hand before the crane touches the frame
- Pre-install any cable bracing you can reach from the ground; it’s nearly impossible once the arch is hoisted
This is also the stage where crews are usually deciding between shelter types, and it’s worth understanding the tradeoffs before you commit hardware to one design. If you’re still weighing your options at this point, this breakdown of a container dome versus tent setup is worth a look before you go further – the wind performance and footprint differences are bigger than most people assume.
Step 3: Hoisting and Securing the Frame
Once an arch is assembled on the ground, the crane lifts it into position over the base rails. This is the highest-risk part of the job, and it’s not the place to rush.
- Use tag lines on both ends of the arch to control swing – wind catches these frames like sails
- Lower slowly onto the base rail bolt pattern; don’t force alignment by muscling the frame
- Bolt each arch leg to the rail before releasing crane tension
- Move to the next arch only after the previous one is fully secured
Pro move: don’t fully torque any bolt until the entire frame is up and squared. Snug everything first, walk the full structure, confirm it’s true, then go back and torque to the final spec. Tightening fully arch-by-arch is how you end up fighting a frame that’s slightly out of square at the last connection point.
Wind load anchoring isn’t optional, even for a “temporary” structure. Ground anchors or ballast need to match the dome’s rated wind exposure for your region – guess on this and you’re rolling dice with the next storm.
Step 4: Tensioning the Cover
This is the step that separates a dome that looks sharp from one that’s flapping and fraying within a season.
Pull the container shelter cover over the frame starting from the center and working outward to both ends evenly. Pulling unevenly from one corner is the fastest way to snag fabric on a bolt head or gusset plate.
- Use webbing straps and ratchets at the base attachment points, not just hand tension
- Work in pairs on opposite sides, tensioning in small increments back and forth
- Check for wrinkles or stress points as you go – they don’t work themselves out later
- Final tension should feel drum-tight – a flat palm strike should produce a taut thump, not a dull give
A loose cover doesn’t just look bad. It flutters in wind, which fatigues the fabric at the attachment points far faster than a properly tensioned portable container roof ever would.
Common Mistakes & Pro Tips from a 20-Year Veteran
After enough installs, you start seeing the same five mistakes on repeat:
- Uneven container placement – even a slight grade throws off rail alignment for the entire structure
- Incomplete anchoring – treating the dome as “temporary” and skipping proper wind-rated anchors
- Skipping the string-line check – eyeballing the base rail instead of confirming it’s true
- Tensioning the cover on a windy afternoon – fighting a fabric sail in 15+ mph gusts is how covers tear and crews get hurt
- Full-torquing bolts too early – locking the frame down before it’s squared, then forcing later connections
The good news on the relocatable side of things: when the install was done correctly the first time, teardown is straightforward. Reverse the tensioning process, unbolt the arches in the same sequence they went up, and the container dome comes down clean – no cutting fabric, no bent frame members, no rework needed before the next site.
Maintenance Best Practices
A dome roof isn’t maintenance-free, but it’s low-maintenance if you stay ahead of it.
- Inspect cover tension monthly, more often in high-wind seasons – fabric stretches slightly over time
- Check bolt torque on base rails and arch connections quarterly
- Clean debris off the cover surface after storms; standing leaves and dirt trap moisture against the fabric
- Look for UV wear or fraying at stress points, particularly where the cover meets the frame
Catch a loose strap or a worn spot early, and you’re looking at a five-minute fix. Ignore it for a season, and you’re looking at a torn panel.
Final Thoughts
Installing a shipping container dome roof isn’t complicated, but it’s not a job for guesswork either. The structures that hold up through years of weather all share the same pattern: square base rails, properly assembled arches, controlled hoisting, and a cover tensioned right the first time.
If you’re planning a site setup and want a structural layout assessment or a custom quote for your specific footprint and wind zone, reach out – getting the engineering right before installation day saves every headache that comes after it.